~ INTRODUCTION ~
Bodycon Quest I – Abakareshi Musume Tachi is an obscure and absurd action RPG released for the Famicom Disk System, sometime in the late 80’s/early 90’s. It’s a goofy Dragon Quest parody full of corny jokes, pixelated boobs, great tunes, and most important of all: adventure. In case the boobs didn’t make it obvious, this was an unlicensed game that you had to buy via mail order. In Japan. In the 80’s. Thanks to this, getting your hands on a boxed copy will set you back nearly 800 USD as of this guide’s writing. Isn’t emulation swell? About the game itself…it’s not too long and can be a little on the rough side in spots, but it’s still plenty fun to plow through and save the world from the evil Dragonlord.
As far as I could see, there were no other guides for this game readily available, so I’ve written one up myself. I didn’t bother listing enemy info since they’re all the exact same as each other, and only take a few hits to kill a piece. So without further ado, here’s everything you need to know to see Bodycon Quest I all the way through to the end, starting from the very beginning.

~ LOTORESIA CASTLE TOWN ~
You start your adventure in a way that’ll look suspiciously familiar to anyone who’s played Dragon Quest III. The king tells you to bring his kidnapped daughter back to him, and gives you 100 Gold to begin your journey. Before you leave Lotoresia, head over to the armory (in the north-west corner of town) and buy a Knife. Remember to equip it!
Lotoresia Item Shop:
Herb (5G) recovers 25 HP.
Water of Life (65,000G) Fully restores HP.
Angel’s Wing (1000G) Lets you travel to a previously visited town. Not useable while in a town.
Lotoresia Armory:
Knife (100G) Attack + 10
Spend 10-15 minutes levelling up outside the castle. You attack by walking directly into enemies, similar to the “bump” battle systems in games like Ys. You should hit level 6 or 7 pretty quick, which is more than enough to take on the next section of the game. From the castle, head southeast until you come across a village. This is your first destination: the town of Papi.
~ PAPI TOWN ~
Papi Armory:
Knife (100G) Attack + 10
Leather Shield (300G) Defense + 5
Clothes (500G) Defense + 10
Papi Item Shop:
Herb (5G)
Mr. Maric Herb (3500G) Heals 15 MP

The town of Papi is entirely filled with elderly men. Did they name it Papi because the population was nothing but old dudes, or was it just a coincidence? Pick up a Leather Shield (and some Clothes if you can afford them) from the armoury, and move onto our next stop on this bodacious journey: the Underpass Cave. It’s due north from Papi.
~ UNDERPASS CAVE ~
The game’s first dungeon is only one floor and is relatively straightforward, so you should be able to navigate it with little trouble. By the way: as a general rule most of the treasure chests in this game are totally useless, and only hold junk like herbs, so I’ve not bothered to mention them unless they’ve something exceptional in ’em.
The boss is in the southwest corner of the dungeon, but if you want more specific directions…
From the entrance:
Head as far right as you can go for several screens, then head down the southern path until you can take a left turn. From this left turn, go down the first southern exit you see, and keep following this corridor until you reach the boss battle room.
You can’t use items or cast spells against bosses, so make sure you do any healing before you enter the arena. The battle is against a nameless lamia dude. His head is his weak point, so keep walking through it to damage him; there’s really no strategy to it. At level 7 he was no trouble. And just like that, you’ve rescued the princess! Enjoy your “prize.” She tells you to meet her at Lotoresia castle, so exit this dungeon and head on back there.
~ LOTORESIA CASTLE (AGAIN) ~
Turns out saving the princess isn’t the end of the game. There’s a first. When you talk to the princess, she asks you to find her two missing sisters: Hermes and Loran. She neglects to tell you where to find them, though. D’oh. After you talk to the princess, chat with the king to receive a key to the Underground Path. The Underground Path is inside the Underpass Cave (the cave you just left), so mosey on back there and retrace the same steps you took to get to the boss. Once you’ve returned to the boss battle room, use the key on the door to leave this place for good.
You’re now on the second continent. From the Underpass Cave entrance, head south, and hug the left shore that’s lined with brown mountains. Then head to the east to find a cave. Grab the Water of Life from the chest and talk to the skeleton chilling on the throne. He’ll fill you on what’s going on in the nearby town of Feathern, saying that there’s a monster living in a cave to the far east that must be defeated to lift the curse that’s affecting the villagers there.
~ FEATHERN (CURSED) ~
From the Underpass Cave entrance, head northeast to find the cursed town of Feathern…but beware! This town is filled with invincible attacking villagers who’ll quickly drain your health. Entering the village is worth it because simply doing so means you can warp back here with an Angel’s Wing / the Teleport spell (once you have it). By the way, it’s hard to tell when you’re walking through it like normal, but the layout of the city is in the shape of the bird-like Mark of Erdrick/Loto from the Dragon Quest series! There’s no need to linger here for the time being though, since there’s nothing to do besides die, so leave for now.
When you leave Feathern, the enemies on the map will be even stronger, so now might be a good time to do some grinding. I recommend grinding all the way up to level 20, so you won’t have to do any more levelling for quite some time, and you get access to the especially useful Teleport spell. It doesn’t take as long as it sounds, I promise.
~ DRAGON MAIL CAVE (NORTHEASTERN CAVE) ~
Now that you’re all beefed up from levelling, you can go and grab the best armour in the game from a nearby cave. I think you can technically skip this, but it’ll make your Bodycon life WAY easier, so it’s well worth getting. From Feathern, go north until you hit the grey mountain range, and move along the range to the east, clinging to it as you go. You should find another cave opening. If you’re under-levelled this place can kill you in a matter of seconds, so tread carefully. If you’re really struggling, consider stopping to level up, or make use of the Shield spell (learned at level 17) to power your way through.
If you want to get this excellent piece of armour, follow these steps:
From the entrance, go down 3 screens, Right 1, Up 2, Right 1, Up 1, Right 1, Down 1, Right 1 (bottom exit), Down 2 (either exit), Left 1, Down 1, Left 4, then down the staircase.
From the staircase:
Go Right 1 (upper exit), Up 1, Left 1, Up 2, Right 1. You should now be in a 4-way intersection. From here, go Up 1, Right 1, Down 1, Right 1, Down 2, Right 1 (lower exit), and Up 1. Dragon Mail get! Equip your great new armour and get outta here.
Now then, I think we’ve put off helping the people of Feathern for long enough. Time to lift that curse. From Feathern, walk southeast until you spot a cave entrance, and go on inside.
~ DRAGON SHIELD CAVE (SOUTHEASTERN CAVE) ~
Luckily, this cave is actually pretty easy to navigate if you know where to go.
From the entrance, move Left 2 screens, Down 2, Right 1, Down 1, Right 2, and down the staircase.
You’re now on the bottom floor of the dungeon. This floor holds the best shield in the game: the Dragon Shield! To find the Dragon Shield from the staircase, move Up 1, Down 1, Left 1, Up 1, and Left 1. Grab that shield and equip it ASAP.
Now backtrack to the staircase for simplicity’s sake; from here, we’ll be making our way to the dungeon’s boss. Move Up 1, Right 1, Up 2, Left 3, Down 3, Right 2, and up the stairs.
Almost done! Head right and use the Underpass Key on the door – heal before moving forward, because there’s a boss fight ahead. Now you’re fighting…whatever this thing’s supposed to be. A fire horse? Who knows. Whatever it is, its weak point is the very top of its head; passing through the tips of its ears/horns should land you the hit. If you’re under levelled this can be a tricky fight, but if you’re at least Level 18 and have the Dragon Shield and Armor you should be OK.
And just like that, you’ve rescued another princess! Loran proves that its her in true Bodycon Quest fashion. Then she gives you her ring. And then…wait what? Welp, guess we’ve just gotta keep on rolling…leave this cave.
~ FEATHERN (UNCURSED) ~
*** IMPORTANT NOTE: *** If you’ve got any equipment in your inventory that you no longer need (which you probably will if you’ve got the Dragon Mail/Shield equipped), sell it at the item shop here. You can’t discard things in this game for some ungodly reason, so this is the only way to free up some inventory space.
Feathern Item Shop:
Herb (5G)
Herb 1 (15G) Heals 50 HP
Mr. Maric Herb 1 (12,000G) Heals 50 MP
Angel’s Wing (1000G)
Feathern Armory:
Short Sword (2500G) Attack + 20
Ring Mail (7300G) Defence + 15
Wooden Shield (4800G) Defence + 10
(Note: if you already have the Dragon Mail and Dragon Shield, the mail and shield aren’t worth buying.)
You can now check out the town of Feathern without people trying to kill you the whole time, so let’s see what’s going on in their neck of the woods. There’s a girl in northern part of town that’ll show you a full screen illustration if you talk to her. Chat with her two more times to see the same illustration, but with less clothes each time. Make sure you stop by the inn before you move on. For the real completionists out there, you can head back to the cave with the throne-sitting skeleton in it to talk to a dancer girl there who’ll show you her 8-bit bits. This obviously isn’t required, though.

Now it’s time to head to the next town. It’s far north, and then to the west from the Dragon Mail cave. If you want more specific directions: from the Dragon Mail cave, head north until you hit another mountain range. Follow the range towards the east, then around the end of the range so you’re heading north, and pass through the winding mountain trail that heads west. Once you spot water next to the mountains, follow the shoreline west, and continue to follow it when it goes south. Once you find another grey mountain range, follow that until you see sand. From the sand, move west one screen, and follow the shoreline once more. After all that travelling, you’ll have reached the town of Aman.
~ AMAN (CURSED) ~
This world has a lot of curses to deal with, geez. Most of the townsfolk of Aman have been turned to stone, and can’t be talked to. Didn’t that happen in Dragon Quest III? Well, moving on…there’s a fortune teller girl with green hair in the upper-leftmost corner of the town, and talking to her lets you see a full-screen picture. Like the girl in Feathern, if you talk to her two more times, the picture gets racier with each conversation. In the upper right-most corner of town is the priestess of the shrine, who explains the town’s situation and asks you to bring the Mirror of Ra– er, I mean, the Mirror of Truth to her. Sorry, I just have Dragon Quest III on the brain for some reason. Weird. Anyway, she shows you her boobs immediately after, so getting her the mirror is the least you can do, really. Leave Aman and continue on your quest; you’ve got a mirror to find.
There’s an important item we need to grab on our way to the pyramid. From Aman, head Up 1 screen, and Left 1. Head over to the crescent shaped river in the middle of all the grassland, and move to the bottom inner corner of it. Now open up your menu and hit SEARCH; you’ll find the MAGIC KEY! This can unlock any door in the game, which’ll come in handy soon enough.

From the crescent river, travel northeast through the sands and you’ll find a pyramid. As you may have guessed, this is the next dungeon.
~ THE PYRAMID ~
There’s no interesting treasure or boss battles in this dungeon, so let’s just make a beeline to the Mirror of Truth.
To get to the mirror:
From the entrance, go Up 3 screens, Right 1, Up 1, Right 1, Down 1, Right 1, Down 1, Left 2, Down 2, Right 1, Up 1, Right 1, and up the stairs.
From the stairs:
Go Up 2 screens, Left 1, Down 1, Left 1, Up 2, Left 1, Down 3, Right 3, and up the stairs.
Now from this staircase, head Up 2 screens, Left 2, Down 2, Right 1, and up these stairs. Almost there now.
From these stairs:
Go Up 1 screen, Left 1 (upper exit), Down 1 (leftmost exit), Right 1, Up 1, and up the final flight of stairs.
Was that enough stairs for you? Grab the Mirror of Truth from the chest and get outta this maze once and for all.
~ AMAN (UNCURSED) ~
Aman Armory:
Long Sword (12,000G) Attack + 30
Plate Mail (18,000G) Defence + 20
Iron Shield (15,200G) Defence + 15
(Note: if you already have the Dragon Mail and Dragon Shield, the mail and shield aren’t worth getting.)
Aman Item Shop:
Herb (5G)
Herb 1 (15G)
Mr. Maric Herb 2 (31,000G) Heals all MP.

Now that you’ve conquered Stair Hell, take the mirror back to Hermes in Aman. She’ll lift the curse from the village, give you her ring, and…wait, again?! Welp. Explore the town and chat with the unpetrified townsfolk if you want; some of them drop some useful hints, but otherwise you may as well move on.
~ RETURN TO LOTORESIA ~
Now that you’ve got both rings in your inventory, it’s time to pop back to Lotoresia. You can use the Magic Key to unlock the door in the Aman shrine, as the warp behind it takes you straight to Lotoresia castle. Or just Teleport / Angel’s Wing, whatever your preference. Talk to the princess, and she’ll give you her ring. You can talk to the king too, but he’s pretty blasé about everything that’s happened so far.
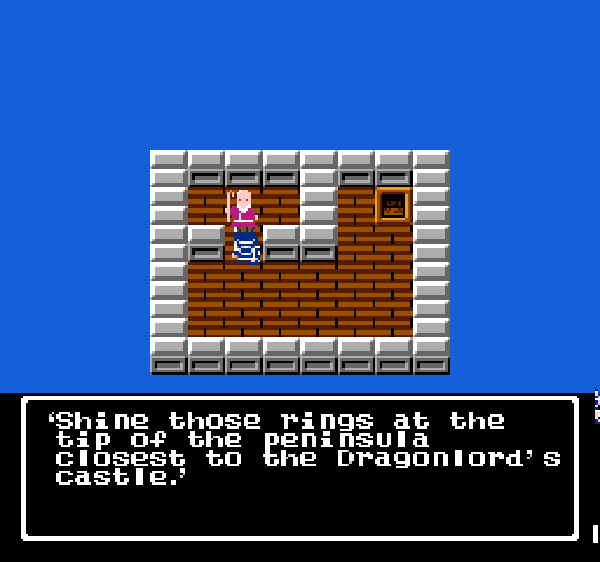
While you’re still in Lotoresia, there’s one last important stop to make. Head on over to the upper west-most part of town, one screen above the inn. Go down the flight of stairs, and use the Magic Key to unlock the door in front of the old man. He’ll tell you some plot stuff, and also how to get to the Dragonlord’s cavern! You need to use the princesses’ rings at the tip of the peninsula closest to the Dragonlord’s castle. Good to know.

We’re on the last leg of this strange journey now, so if there’s anything you haven’t gotten, now’s the time to do so. The maximum level you can hit (without cheats) is 30. Your HP caps at level 26 though, so use that information to do whatever you see fit. I went ahead and maxed out, but I doubt it’s needed to finish the game. Heal up once you’re ready to move on, because it’s time to beat Bodycon Quest I!
~ THE DRAGONLORD’S CASTLE ~
From Aman town, head Up 1 screen, Right 2, and Down 2 to reach the peninsula the old man mentioned. Stand on the square closest to the Dragonlord’s Lair and use Celine’s Ring to make a bridge appear. Now go on into the cave. This is the last dungeon in the game, and the enemies are tougher than ever before, so be on your guard.
From the entrance:
Go Up 1 screen, Right 1, Down 1, Right 1, Up 3, and down the stairs.
From the staircase:
Go Down 2 screens, Left 1, Up 1, Left 1 (second exit from the top), Down 1, Left 1, Down 1, Right 1 (bottom exit), Right 1 (middle exit), Right 1 (top exit). Take the bottom staircase. Now head all the way to the left (using the top exit) and head down the next staircase. Head to the right using the bottom exit, and open the chest to find the Dragon Sword! As you’ve probably guessed, this is the best weapon in the game. Once you’ve got this rad sword, backtrack to the room with two staircases and head up the uppermost one this time.
From this staircase:
Go Up 2 screens, Left 1, Left 1 (bottom exit), Left 1, and down the stairs. Just head all the way right, and down these stairs. Now go all the way up…and here’s the big bad. Heal before talking to him if you need to. Now it’s time to finish him once and for all.
The Dragonlord is the same as the other boss battles in the game; he’ll kinda bounce from one side of the screen to the other, and shoot fireballs at you while he does so. His weak point is also the top of his head, so run across it as much as you can. If you’re having trouble landing hits, try to predict his trajectory and run towards where you think he’ll be in a few seconds, instead of trying to blindly chase his head. At max level with the Dragon Sword equipped, you should knock off 100 HP every time you manage to land a hit. With the Dragon Armor equipped as well, you’ll be able to sustain tons of damage, so he shouldn’t be too much of a threat. Teach him a lesson, and…
You’ve beaten the game! The ending’s pretty short, but it’s all about the journey or some song and dance like that. Congratulations on finishing Bodycon Quest I! You have now officially entered the echelons of the few people who’ve cleared this especially obscure 80’s H game.

~ EXTRAS ~
Here’s a fun cheat: to start the game as a crazily overpowered character, make your name “God” if you’re using the English translation patch (note capitalization), or “むてきね” if playing the Japanese original. This will make you start the game at the max level of 30! You’ll also have maxed out Gold which is pretty nifty. This’ll make the game dead easy if you’re not interested in grinding, or for subsequent playthroughs.
The only other known code is to look at all of the special illustrations. On the title screen, press up, up, left, right, up, right, down, left and Start on Controller 2. Then start a game as normal. The screen will turn orange when done correctly. You can now scroll through all of the risqué pictures at your leisure, pressing start to move onto the next one.
~ SPELL LIST ~
- Heal (LV 8) MP cost: 9 / Heals 20 HP.
- Zapper (LV 11) MP cost: 12 / Damages all enemies on screen somewhat.
- Healer (LV 14) MP cost: 20 / Heals 70 HP.
- Shield (LV 17) MP cost: 25 / Makes you invincible for a few seconds.
- Teleport (LV 20) MP cost: 20 / Allows you to teleport to any previously visited towns. Cannot be used in dungeons.
- Dead (LV 23) MP cost: 70 / Instantly kills all enemies onscreen.
~ CLOSING ~
And with that, this guide comes to its end. This is my first time writing a walkthrough for an entire game instead of just a little tips and tricks entry, so let me know if you find any errors. By the way, if you like this game and you haven’t played Dragon Quest III, you should consider checking it out. There might not be any 8-bit tiddies, but it’s one of the most iconic RPGs of its day and served as a, uh, “heavy inspiration” for Bodycon Quest. Yeah, let’s call it that. Inversely, if you’ve somehow stumbled upon this guide and have played DQIII but not Bodycon, you should give it a shot. It’s great for a laugh, and despite a little bit of crunchiness here and there (the way the screen scrolls can be a bit janky), it’s a fun action game if you like the bump battle system. It’s also an interesting footnote in Japanese game history that I desperately wish that there was more insider development info on. Maybe someday…I guess that’s all I have to say, so thank you for reading! I hope you found this helpful. Someone please translate Bodycon Quest II so I can play it. Guide © NESjunk pls don’t steal

